I wanted to do something extravagant for Earth Day, so of course I took to Pinterest for some ideas. I ended up coming across some recycled water bottle activities inspired by the artist Dale Chihuly. I did a test run and sadly it was a failed attempt. From here, my creative mind was running in circles trying to think of something to do with these awesome spiral water bottles. After a few hours of thinking of ideas and shutting them down, I thought of the beautiful Truffula trees in The Lorax.
Now that I had an idea, I was thinking of what I needed to make this tree.
- Something for the tree trunk
- Paint
- A TON of water bottles
- A classroom full of creative students
After going on an intense manhunt for something to use as the tree trunk, I finally found the perfect item. Only $10 at the local Home Depot, I bought a sonotube (used to pour concrete) that was 6" wide. I got them to cut it down from the original 8 feet to about 5 feet tall.
I started our project by reading the classic Dr. Seuss picture book, The Lorax. We talked about all the different things that happened in the story that hurt our environment. At this point, our sonotube had been sitting in the class all day, and I had students think about what we might be doing with this object. Of course, they were quick to figure it out. From there, we discussed why trees are so important, what is happening to them in our society, and what we can do to help them.
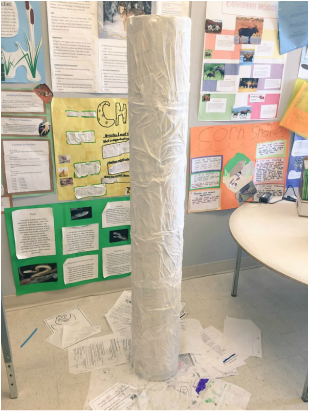
The following day, we began our project. I bought some paper towel which we used to paper mache the tube to make it more "tree like". We did two layers of the paper towel onto our tree trunk. The key learning for the paper mache was to not put the pieces flat onto the trunk, but to ensure they were wrinkly and uneven so that it had a real tree look.
Now that I had an idea, I was thinking of what I needed to make this tree.
- Something for the tree trunk
- Paint
- A TON of water bottles
- A classroom full of creative students
After going on an intense manhunt for something to use as the tree trunk, I finally found the perfect item. Only $10 at the local Home Depot, I bought a sonotube (used to pour concrete) that was 6" wide. I got them to cut it down from the original 8 feet to about 5 feet tall.
I started our project by reading the classic Dr. Seuss picture book, The Lorax. We talked about all the different things that happened in the story that hurt our environment. At this point, our sonotube had been sitting in the class all day, and I had students think about what we might be doing with this object. Of course, they were quick to figure it out. From there, we discussed why trees are so important, what is happening to them in our society, and what we can do to help them.
The following day, we began our project. I bought some paper towel which we used to paper mache the tube to make it more "tree like". We did two layers of the paper towel onto our tree trunk. The key learning for the paper mache was to not put the pieces flat onto the trunk, but to ensure they were wrinkly and uneven so that it had a real tree look.
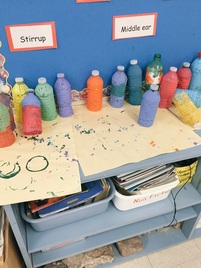
Of course, we let our tree trunk dry over night, and the next day we began the painting process. By this time, the students had brought in bags and bags of recycled water bottles. We learned through experience that the best ones to use are just the normal 500mL water bottles. We cut the bottom of our water bottles off (about an inch thick or so), and we used that piece as our paint cartons.
We didn't focus on any warm, cold, secondary, primary colours, I left it open for students to experiment with paint colours and create their own masterpieces. Lots of the students chose to do multicoloured ones, which looked great! We used tempura paint, but if you have acrylic I suggest using that instead to avoid chipping when they get cut.
We didn't focus on any warm, cold, secondary, primary colours, I left it open for students to experiment with paint colours and create their own masterpieces. Lots of the students chose to do multicoloured ones, which looked great! We used tempura paint, but if you have acrylic I suggest using that instead to avoid chipping when they get cut.
 | 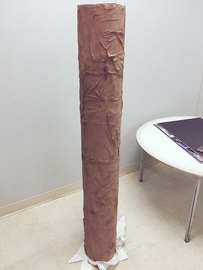 |
Our tree trunk is now complete and waiting for its colourful leaves.
Each student painted about 3-4 water bottles. Now that our bottles are all dry, we began to cut them into the spirals. After the first test run with a couple students, I learned that we really had to focus on cutting them thinly so that they spiral down nicely. Check out this brief video of how to cut the bottles into spirals.
Attaching the leaves was the most time consuming part of this activity. I heated up a paperclip to poke little holes at the ends of the spiral bottles. I then used a box of multicoloured paper clips (from the dollar store) and attached a paperclip to the water bottle. We began by filling the top circle of the tree. After the whole top was covered, we began to clip them onto other leaves on the tree to make it look fuller.
We left the bottle tops on the bottles, but as we moved on to attaching the bottles to other leaves, we cut the tops off so it all flowed nicely.
In my original vision for this lesson, I wanted students to create a large poster to go with our creation. This posted would have provided information about the importance of trees. My hope was for this part to be inquiry based, where students would search for various sources of information about trees, and come together to create a display. However, our timing was off, and my practicum was coming to an end, so this part of the lesson was never achieved.
Although this took quite some time, myself, and the students loved the outcome of our tree. Our hard work payed off on this art experiment.


 RSS Feed
